
Your First Snug Application
This first exercise is for anyone who wants to see Snug working before learning about its configuration options. You can follow it even if you have never built a Java application before.
You may have written a Java application yourself, created one with an AI assistant, or arrived here without an application of your own. We will use the existing Snug JavaFX demonstration application so that everyone starts with the same files. The goal is to create and run a Windows executable first; the explanations of JAR files, runtimes, and packaging will make more sense once you have seen the result.
Your first Snug build
For this first build, you will download Snug and the prebuilt Snug JavaFX demonstration JAR, create a Windows executable using the Snug Quick Build helper, and then run it. You do not need to compile Java code or open a terminal:
- Open the latest Snug release page and select the Windows x64 ZIP file from its Assets list:
https://github.com/synapticloop/snug/releases/latest/ - Extract the ZIP file to a folder.
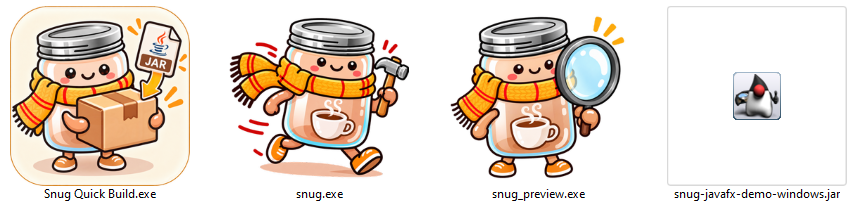
The unzipped folder will have the following icons:
|
|
Builds Windows executables from Java applications |
|
|
Lets you build an executable by dragging a JAR file onto it |
|
|
Lets you preview Snug's launcher dialogs. |



For this exercise, we will use Snug Quick Build. The other tools are explained later in the book.
- Download the existing Snug JavaFX demonstration JAR and place it in the extracted Snug folder. A JAR is the file containing the Java application; for this exercise, you do not need to know how it was made. Download the demonstration file from:
https://github.com/synapticloop/snug/blob/main/assets/snug-javafx-demo-windows.jar
On the GitHub file page, click “Download raw file” to save the JAR.
|
|

Your folder should now look like the following:
|
|
- Drag the JAR file onto
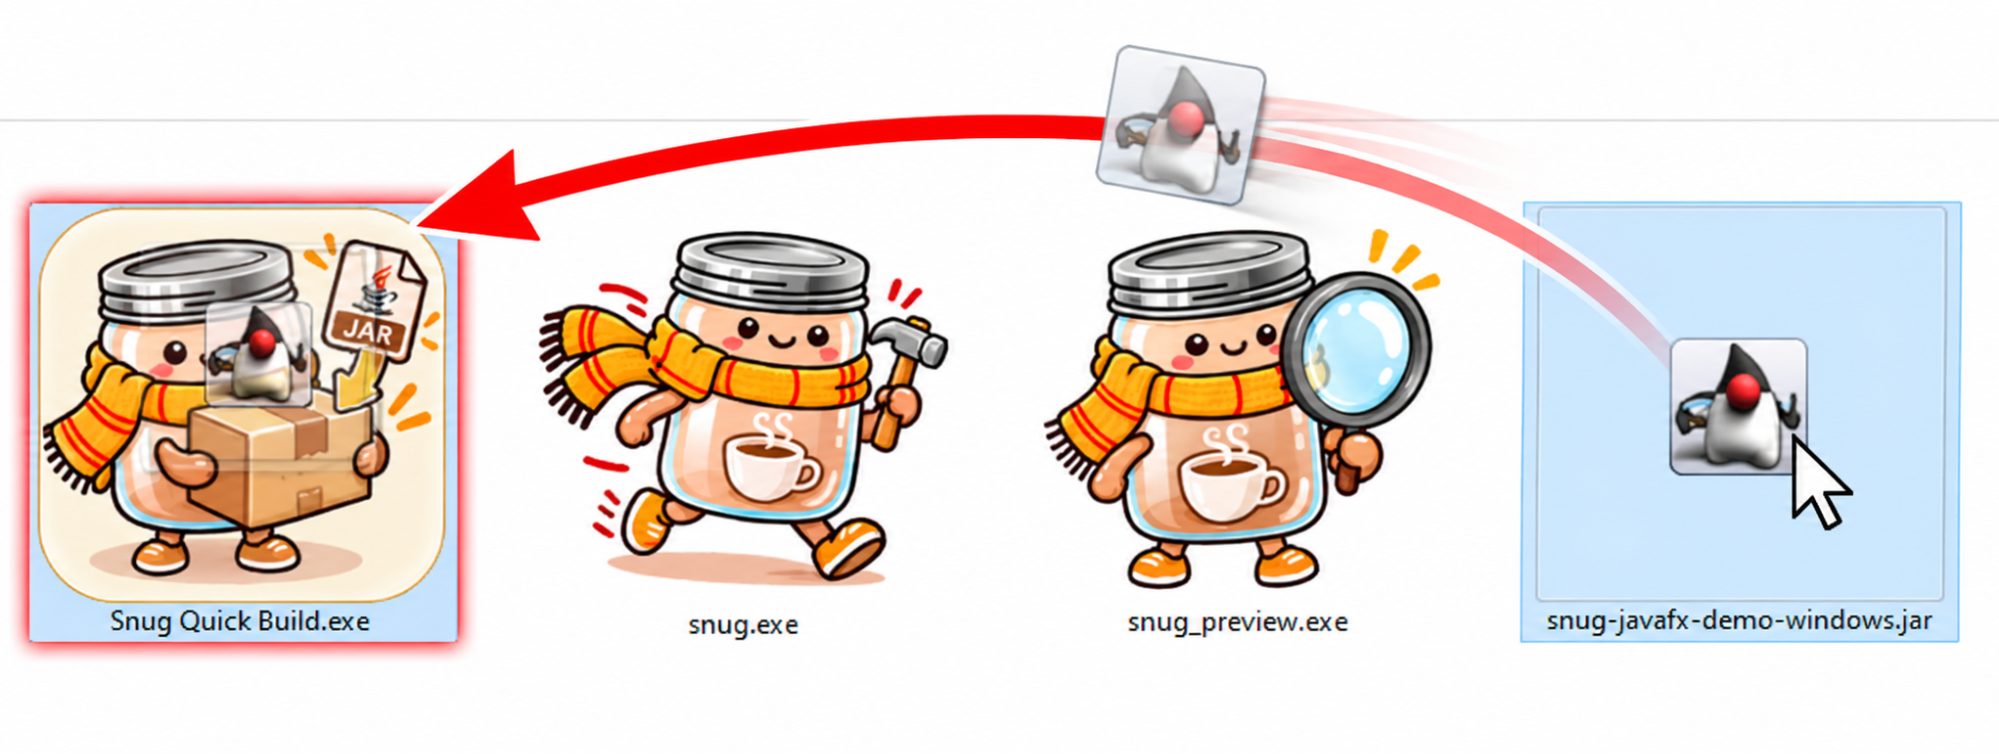
Snug Quick Build.exe. - To drag a file, point at the JAR file, hold down the left mouse button, move the pointer over
Snug Quick Build.exe, and release the mouse button.
|
Image: The demonstration JAR being dragged onto Snug Quick |
- Wait for Snug Quick Build to finish creating the Windows executable. A new file named
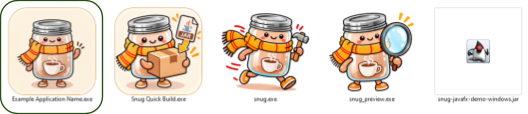
Example Application Name.exeshould appear in the same folder. Note: This is the default filename used by Snug Quick Build. If no EXE appears, open snug-build.log in the same folder in Notepad and check the Quick Build error before continuing. - Double-click
Example Application Name.exeto run it. If a compatible Java runtime is not already available, Snug may ask permission to download one. Follow the on-screen instructions. Once a suitable runtime is available, the demonstration application should open.
|
Image: The new application " |
What just happened?
A JAR contains the Java application you started with. The Snug Quick Build helper uses the normal Snug builder to turn it into a Windows executable (.exe).
For now, getting your first executable to run is enough.
Where to go next
You now have a working Windows executable. If you want to give your application its own name, icon, and other settings, continue to Section 2: Building with Snug, where we introduce the normal Snug builder.
|
~ ~ ~ * ~ ~ ~ If you simply wanted to try Snug, you can stop here. ~ ~ ~ * ~ ~ ~ |
TABLE OF CONTENTS
SECTION 2:
BUILDING WITH SNUG 15
Building an Application with Snug 16
Quick-Start: Hello Snug JavaFX 16
Packaging Your Own Application 21
SECTION 3:
CUSTOMISING THE SNUG USER EXPERIENCE 23
What Happens When Someone Double-Clicks? 24
Introducing the snug.options File 26
SECTION 4:
CONFIGURATION OPTIONS 31
How Snug Configuration Works 32
Changing the Cache Location 37
Application Instance Behaviour 41
Splash Screen Configuration 41
Launcher Messages and Localisation 44
Creating Localisation Files 45
Using a Different Options File 48
A Practical Configuration Workflow 50
SECTION 5:
CUSTOMISING LAUNCHER MESSAGES 53
Your First Message Change and Preview 54
Understanding Launcher Dialogs 55
Common Localisation Key Suffixes 60
The Runtime Installation Dialogs 60
Replacement Tokens and the Key Reference 68
Keys Without Replacement Tokens 73
Before You Build: Final Checks 77
SECTION 6:
MANAGING YOUR SNUG PROJECT 78
What Should Go in the snug Directory? 79
What Should Be Saved with the Project? 80
Should snug.exe Be Committed? 80
SECTION 7:
TECHNICAL DETAILS 83
The Builder and the Launcher 85
Anatomy of the Windows Executable 86
The Java Application Remains a JAR 88
What Happens When the Executable Starts 88
Application Identity and the Cache 89
When the Java Application Exits 94
Code Signing Is Separate from Packaging 97
Why Snug Does Not Bundle Everything 98
Keeping the Layers Separate 98
Technical Details Will Evolve 100
Command-Line Options Reference 102
Quick Overview: Common Builder Options 102
Command-Line Practical Reference 105
Snug Builder (snug.exe) Options Reference 108
Snug Preview (snug_preview.exe) Options Reference 125
Understanding the Project Layout 128
Building the Complete Windows Release 129
Building Individual Components with Cargo 130
Making Changes and Contributing 132
Copyright, Licensing, and Third-Party Notices 140