
Building an Application with Snug
The Builder and Launcher
In the first exercise, Snug Quick Build used example settings. Here you will use snug.exe directly, choosing the application's name and company. Snug creates the executable, and its built-in launcher starts the Java application when someone runs it.
- Snug Builder (
snug.exe)
This is the tool you use to create the finished Windows executable. - Snug launcher
The builder embeds this launcher in the executable you create. It prepares the Java runtime and starts your application when someone runs that executable. The person running your application uses it indirectly, but does not normally know it is there.
Before You Begin
If you completed Your First Snug Application, you already have the files you need. Otherwise, download and extract the Windows x64 Snug release from
https://github.com/synapticloop/snug/releases/latest/
and place snug-javafx-demo-windows.jar from
https://github.com/synapticloop/snug/blob/main/assets/snug-javafx-demo-windows.jar
in the same folder.
On the GitHub file page, click the “Download raw file” icon to save the JAR.
Quick-Start: Hello Snug JavaFX
We will now package the same demonstration application using the command-line builder.
Use the example --name and --company below for this exercise. For your own application, choose these carefully because Snug uses them as part of its identity.
Open the folder containing snug.exe in File Explorer. Click the address bar, type powershell, and press Enter. A PowerShell window will open in that folder.
|
|
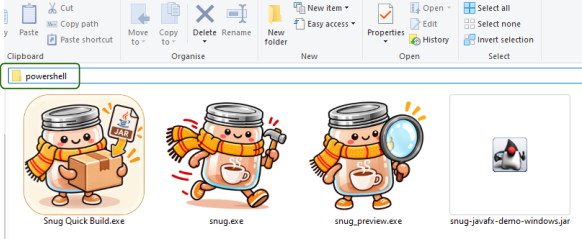
Now enter the following command:
|
|
|
|
|
|
Note: This command packages the demonstration JAR with the application display name “
Because no output filename is specified, Snug creates |

You should see output similar to this authentic example. The byte counts may differ with the Snug version and the JAR being packaged:
|
|
|
You can now run the Windows executable by double-clicking
snug-javafx-demo-windows.exe or, from the same terminal window, by running:
|
|
|
|
When you launch the executable, Snug checks for a suitable Java runtime. If none is available, it offers to download and install the required runtime components. (If you completed Your First Snug Application at the beginning of the book, Snug will reuse the runtime already available on your computer.)
|
|
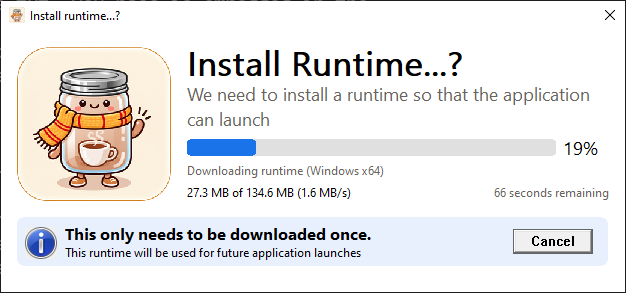
Once the required runtime is available, Snug starts the demonstration application. If a suitable runtime is already available, Snug can skip the download step. The screenshot of the running application shows the result of a successful launch.
|
|
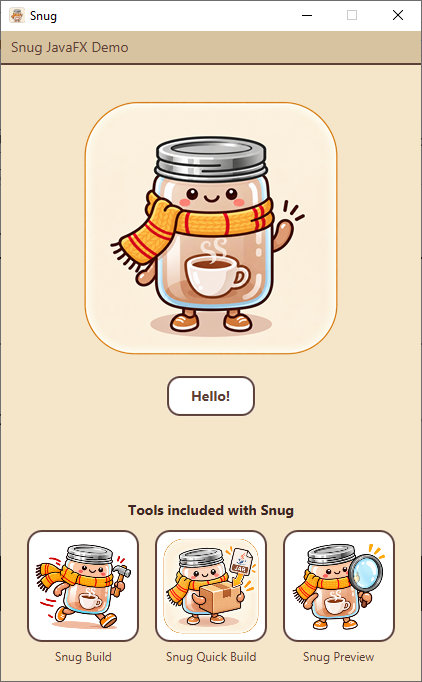
Snug can reuse a downloaded runtime on future launches while it remains available and meets the application’s requirements.
|
|
Note: The screens shown may differ when new versions of Snug or
Once the demonstration application opens, the build and launch have succeeded. |
The final directory should contain the following files:
|
|
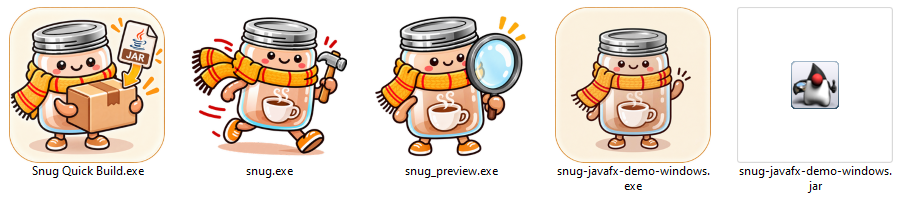
Above (from left to right) you can see the icons for the Snug Quick Build helper (Snug Quick Build.exe), Snug Builder (snug.exe), Snug Preview (snug_preview.exe), the ready-to-run Windows executable (snug-javafx-demo-windows.exe), and the original Java application (snug-javafx-demo-windows.jar).
|
|
Tip: If you change nothing else, give your application its own icon. The icon is used for the Windows executable and also appears in Snug's launcher dialogs. A simple, recognisable icon immediately makes the finished application feel more complete and easier to identify. |

|
|
IMPORTANT: Choose the |

That's It
You have now used snug.exe directly to turn the demonstration JAR into a Windows executable, with your own application name and company.
The rest of this book explains how to refine that result, from icons and splash screens to Java runtime settings and launcher messages.
|
~ ~ ~ * ~ ~ ~ "You have packaged a Java application into a Windows executable that someone else can simply double-click and run." ~ ~ ~ * ~ ~ ~ |
Packaging Your Own Application
Once the demonstration works, try the same process with your own Java application. The generic My Application example below represents your own project; replace its filenames and identity values with yours.
Before You Begin
Start with a known-working application. For a single-JAR build, use a runnable fat JAR. “Runnable” means the JAR identifies where the application starts; “fat” means it bundles the application’s compiled code and required Java libraries into one file. If someone or a build tool created the JAR for you, ask for a runnable fat JAR. An ordinary JAR may depend on additional files that Snug cannot obtain automatically.
If your application uses JavaFX or other native libraries, those dependencies must also support Windows x64. Downloading a Java runtime does not supply your application’s dependencies.
Build the Executable
Place your JAR beside snug.exe and open PowerShell in that folder. Replace my-app.jar and the example identity values below with your own: In this PowerShell command, type the backtick (`) at the end of each continued line, then press Enter.
|
|
|
|
The --name value is the application’s display name. The --output value chooses the executable’s filename.
Run and Share
Launch My Application.exe and check that your application works as expected.
Then copy the executable to another Windows x64 computer and test it there. Ideally, use a clean computer without your development tools, project files, or a Java runtime you installed for development. This helps reveal anything the application relies on from your own computer. The recipient does not need snug.exe or your original JAR. A compatible Java runtime must be available, or Snug must be able to download one.
If your application depends on external configuration, data files, or native libraries outside the packaged JAR, arrange those separately and test their locations on the receiving computer.
Applications with Several JARs
If your application and its dependencies are separate JARs, place them together in one directory and use that directory as the input. Snug includes JARs directly inside it; it does not search subdirectories.
For these applications, you may need --main-class to identify the entry point. See Section 4: Configuration Options.
If It Does Not Start
Confirm that the Java application works outside Snug, then check the launcher log. Record the Snug version, command used, and complete error message when investigating the problem. Section 7: Technical Details explains where to find the logs.